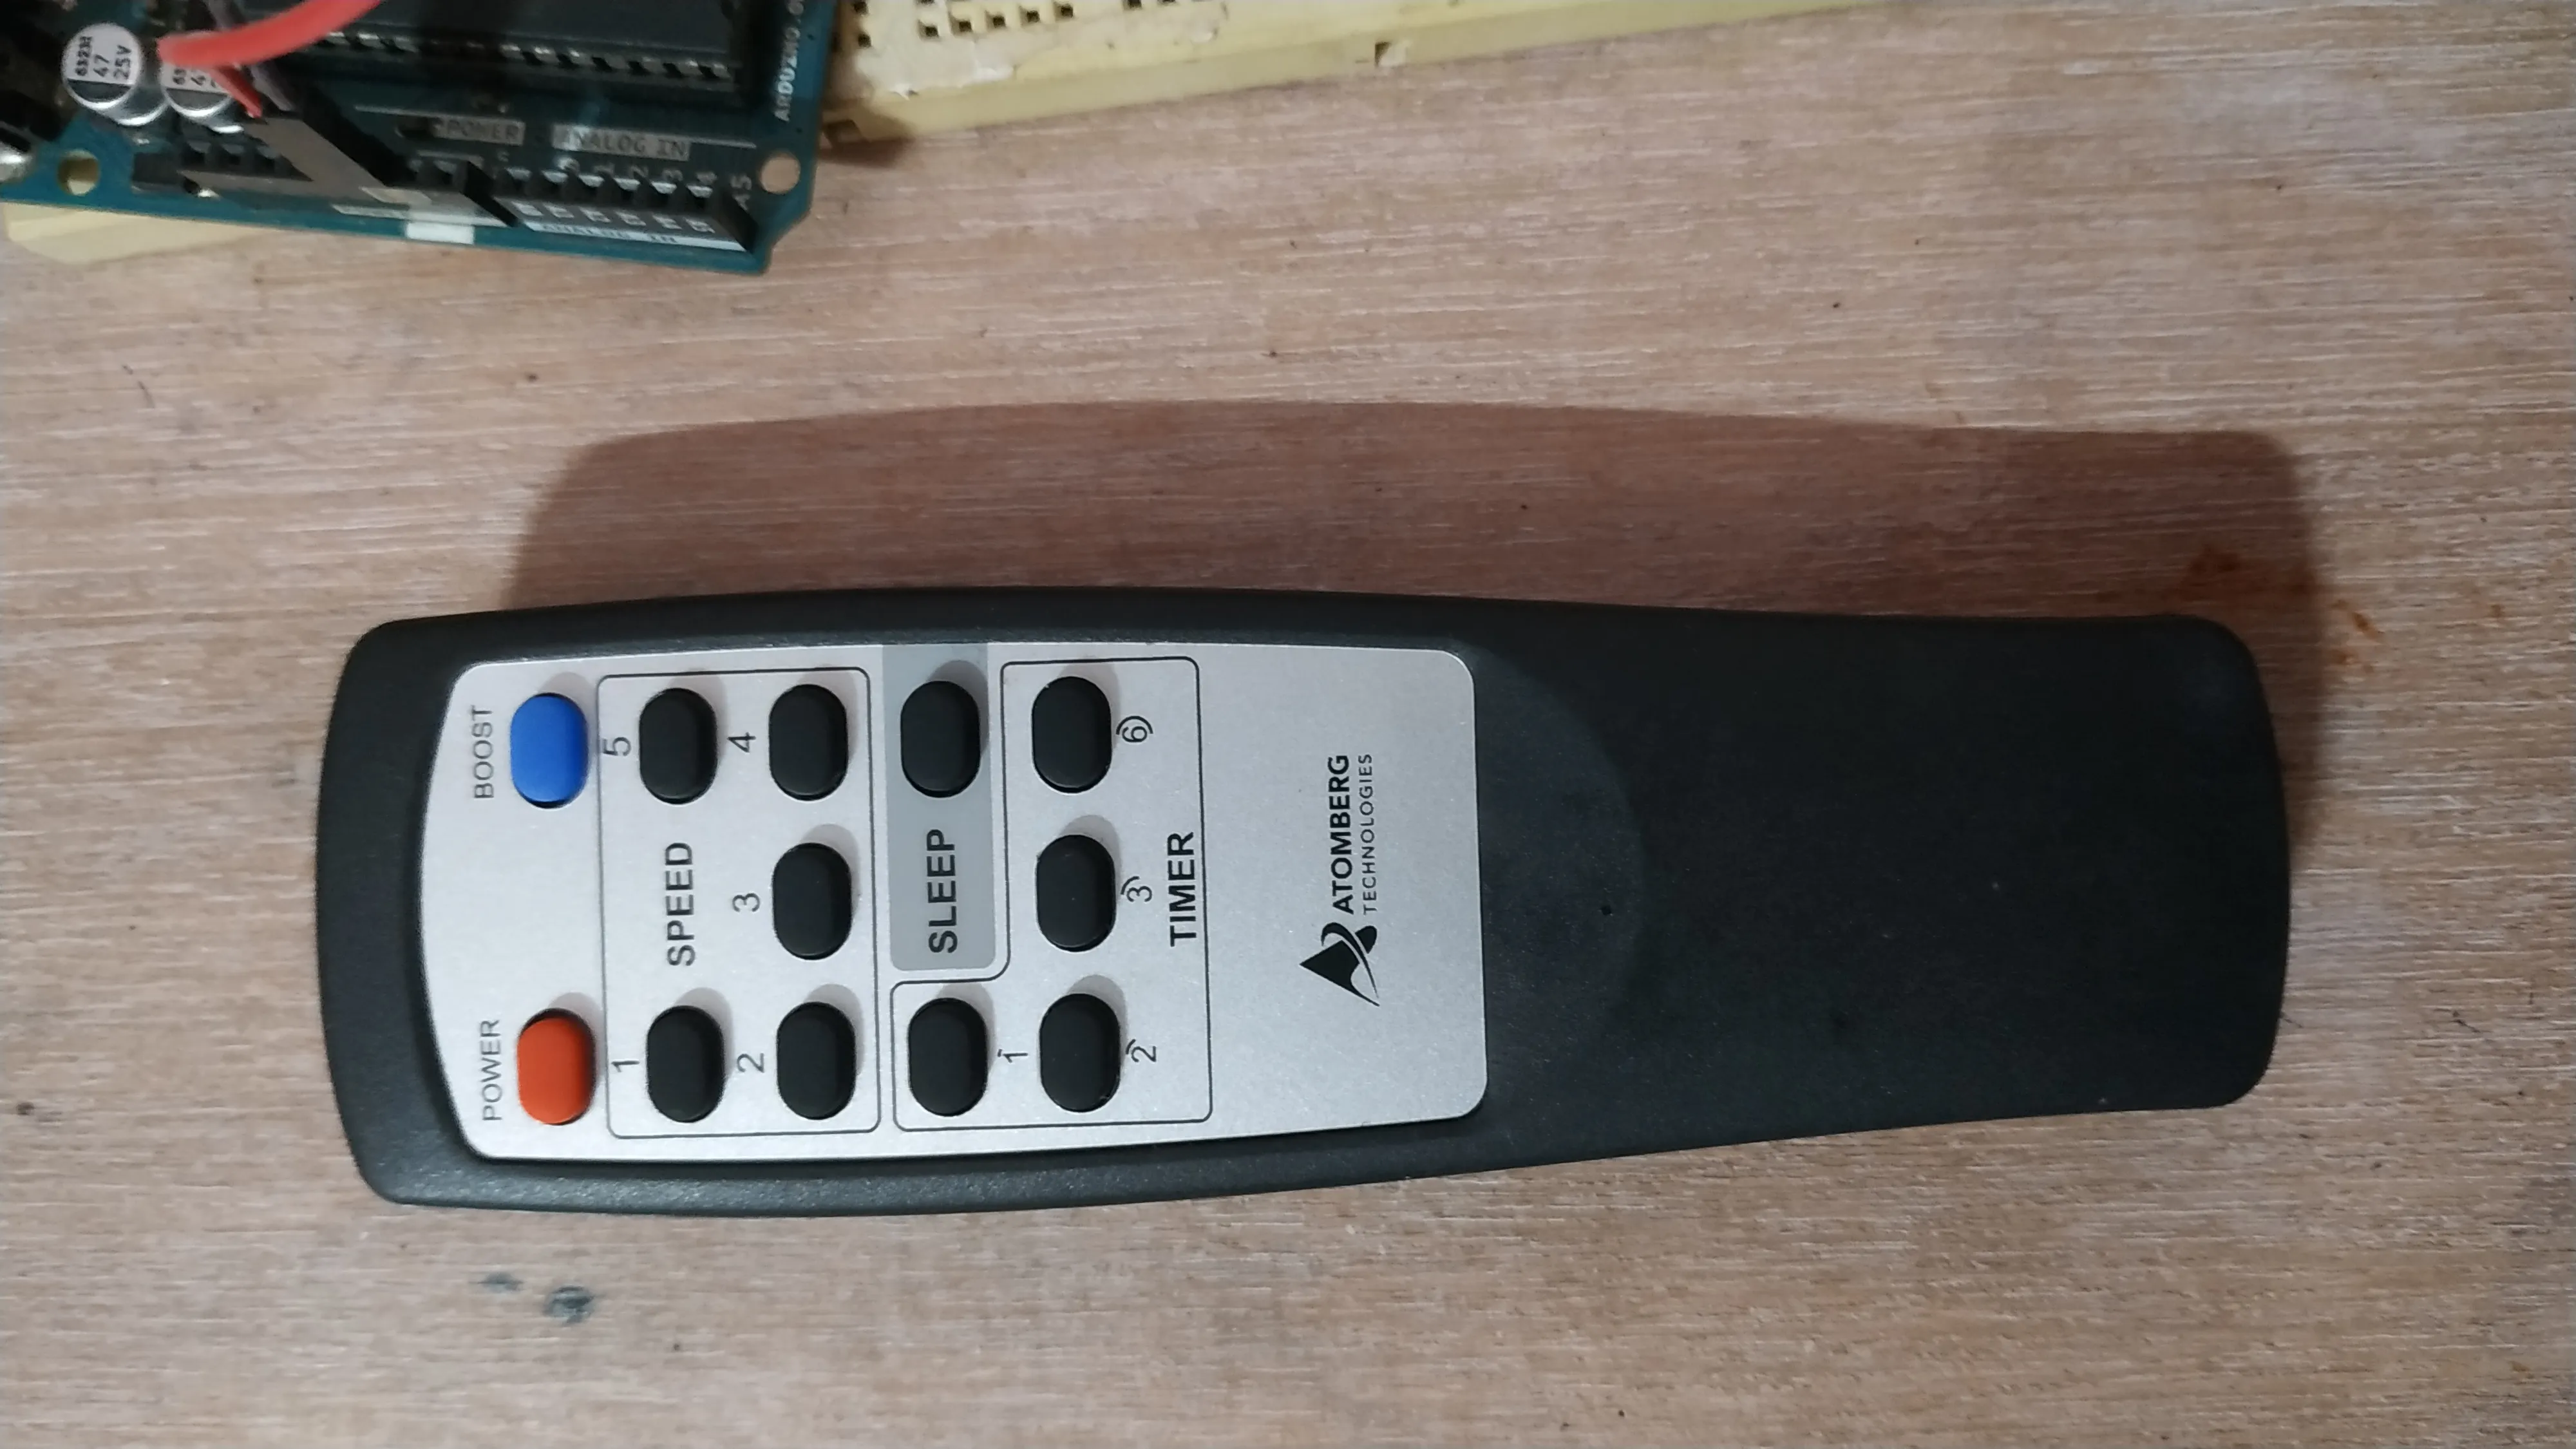
Atomberg Gorilla Efficio BLDC fan IR remote codes
It’s been more than a year since I replaced the ordinary ceiling fan at home with this new BLDC fan from this startup called Atomberg. There’s no iota of doubt that this fan has helped reduced our monthly electricity by a good margin. It is way better than ordinary ceiling fans in terms of efficiency and air delivery. Another good feature is that reducing the speed of the fan actually reduces electricity consumption, unlike in other fans.
The remote however did have problems from the start. It isn’t well designed (I don’t mean the physical looks, but rather the things inside).
The biggest issue it had was battery drainage. Two AAA batteries hardly lasted couple of months. Also often we’d have to press two times for it to turn on or off. While the remote we have for our TV from SONY ran on manufacturer-provided batteries for several years.
Our first remote stopped working after one year. I raised a complaint and within a couple of days, they shipped a new remote free of cost. Apparently, the remote has a warranty of 1.5 years. The new remote though looked the same was somehow better. The battery drain issue looks fixed. But very rarely there’s still trouble with the buttons. The cost of the remote is only Rs 150 ($2) and hence if at all it stops working its not a big issue at all.
Then one rainy day after we had returned home from shopping we discovered the fan to be intact but it had stopped working. Another complaint raised and in 2 days a service personnel came home and replaced the whole circuit board with a brand new PCB. The new PCB looked way better than the old one. The service technician said it might have been damaged during the thunderstorm. That replacement too was free. Kudos to Atomberg for considering after-sales service so seriously.
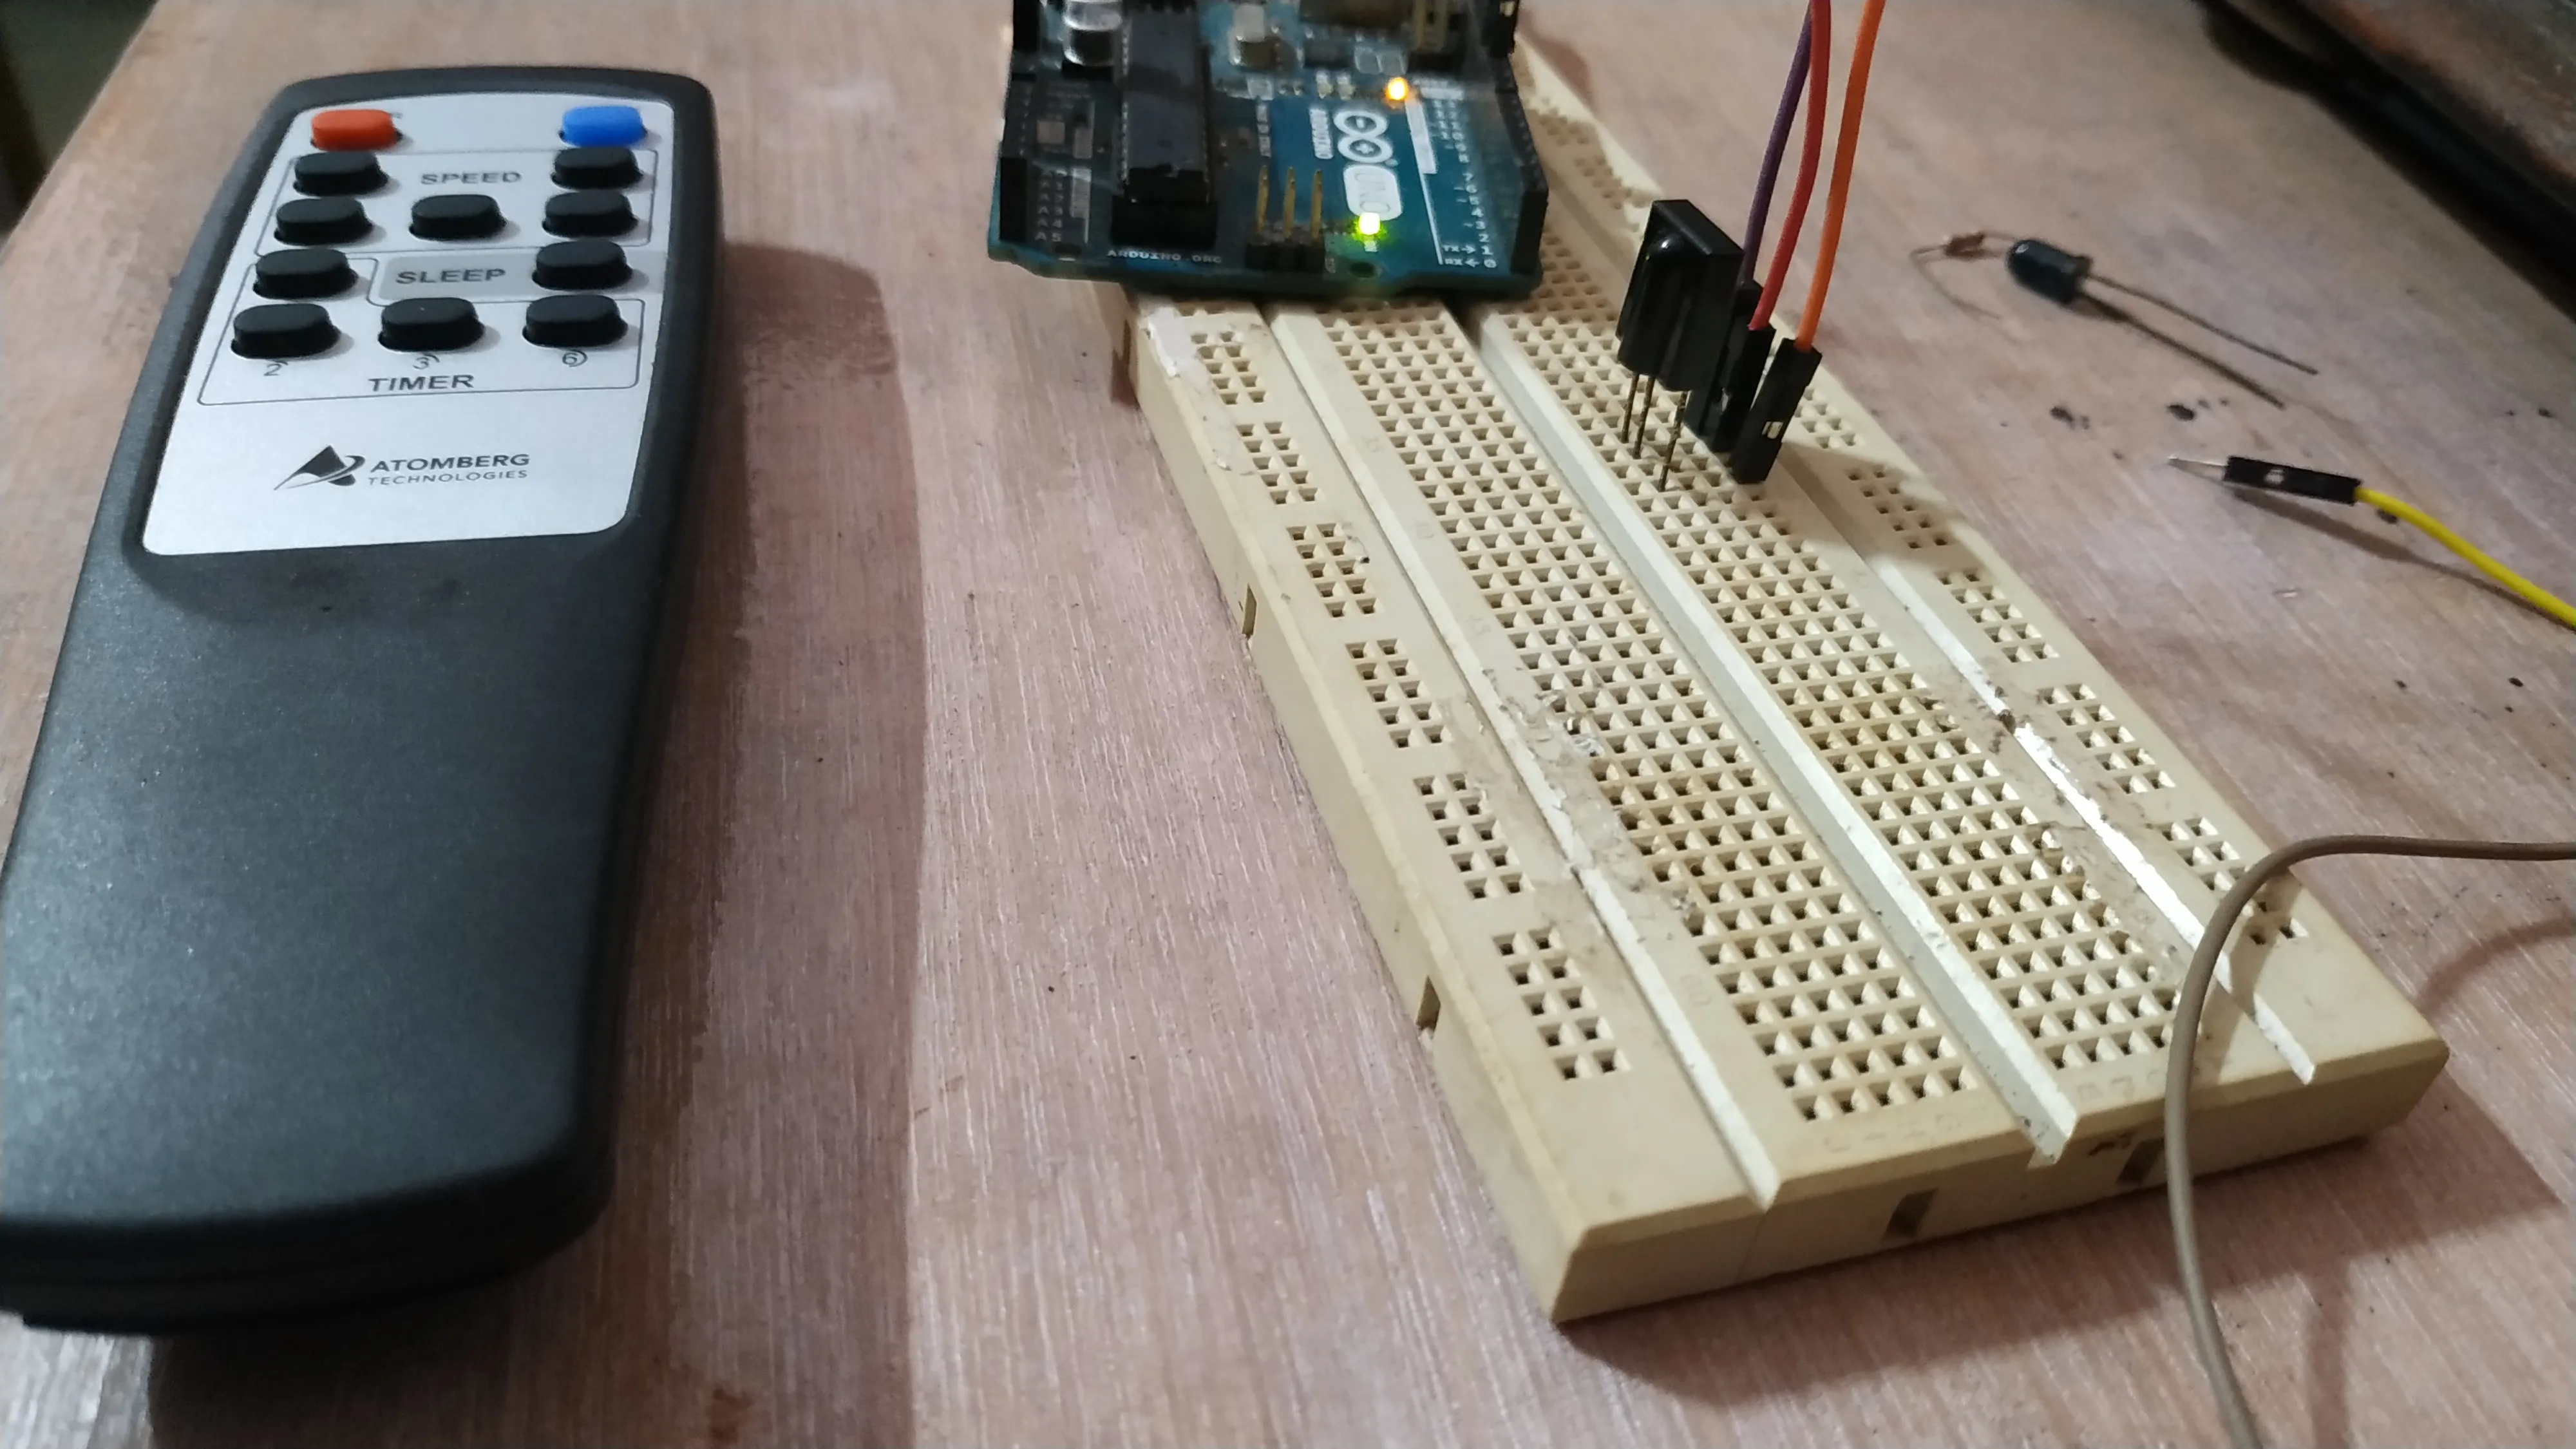
The reason for this post is: The two days that I didn’t have the remote for this fan there was no way I could turn it on. Hence I decided to decode the IR signals coming out of the remote and keep a copy of it just in case it decides to give trouble in the future.
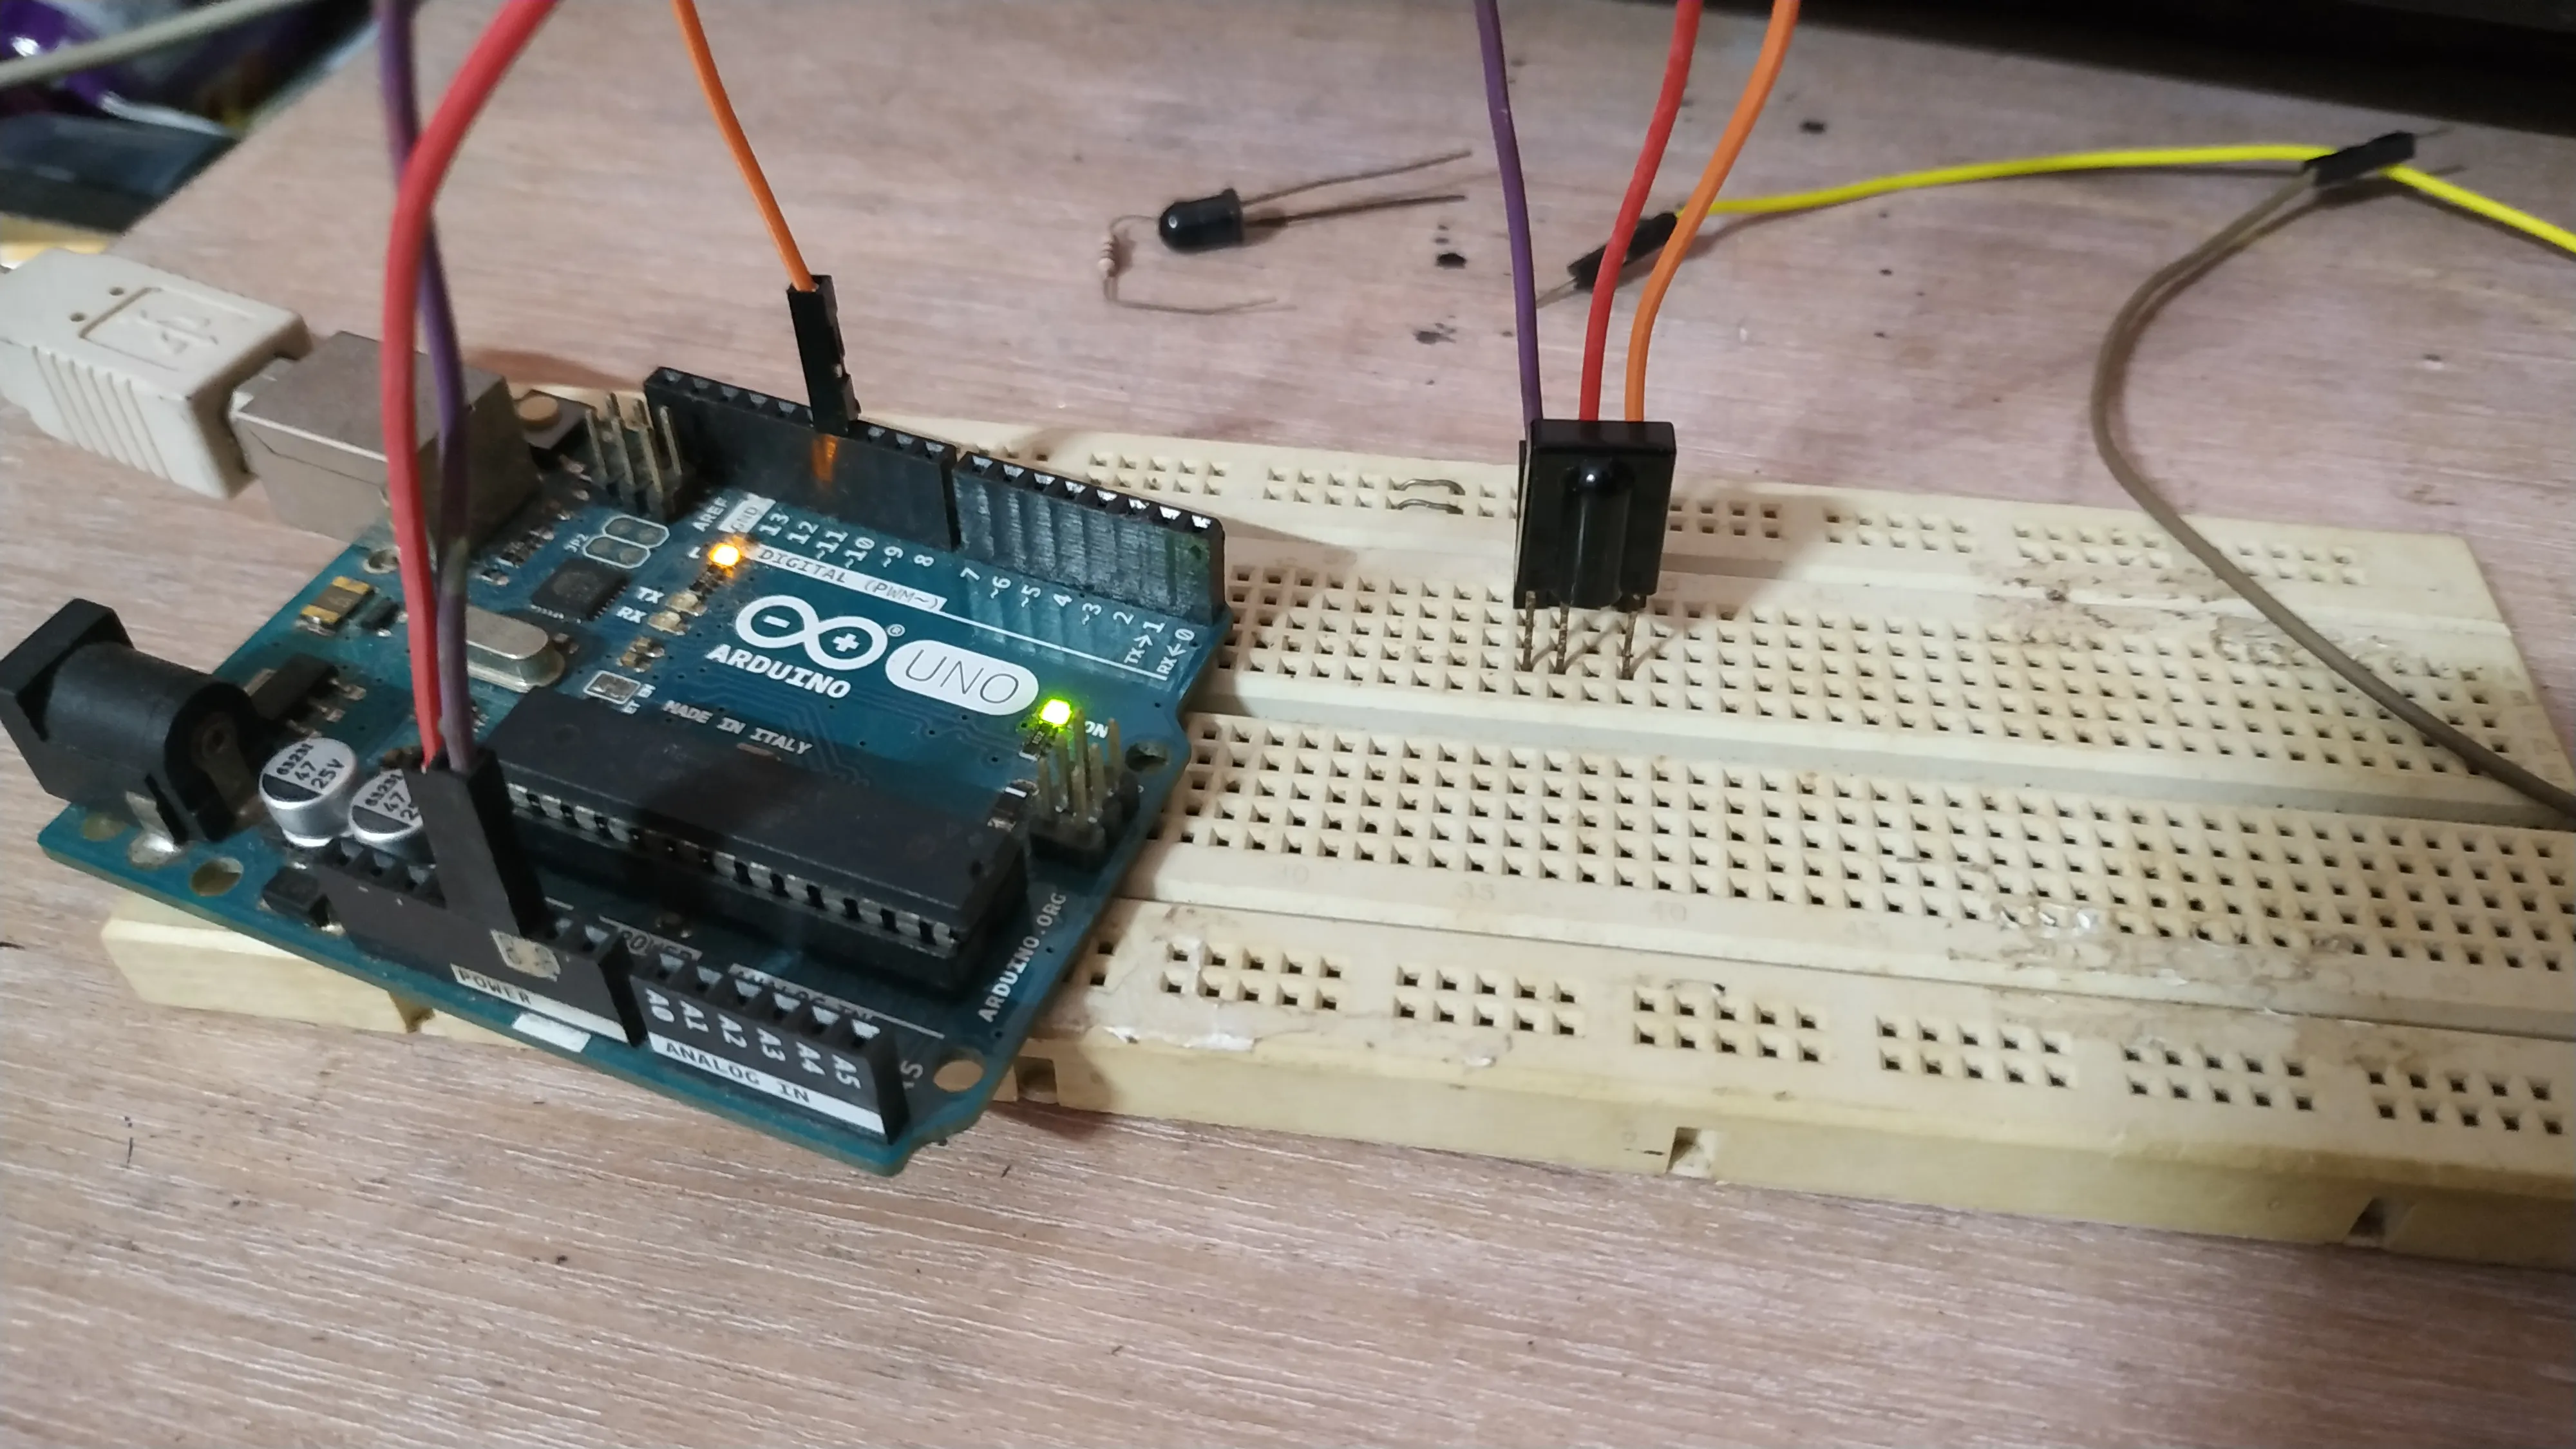
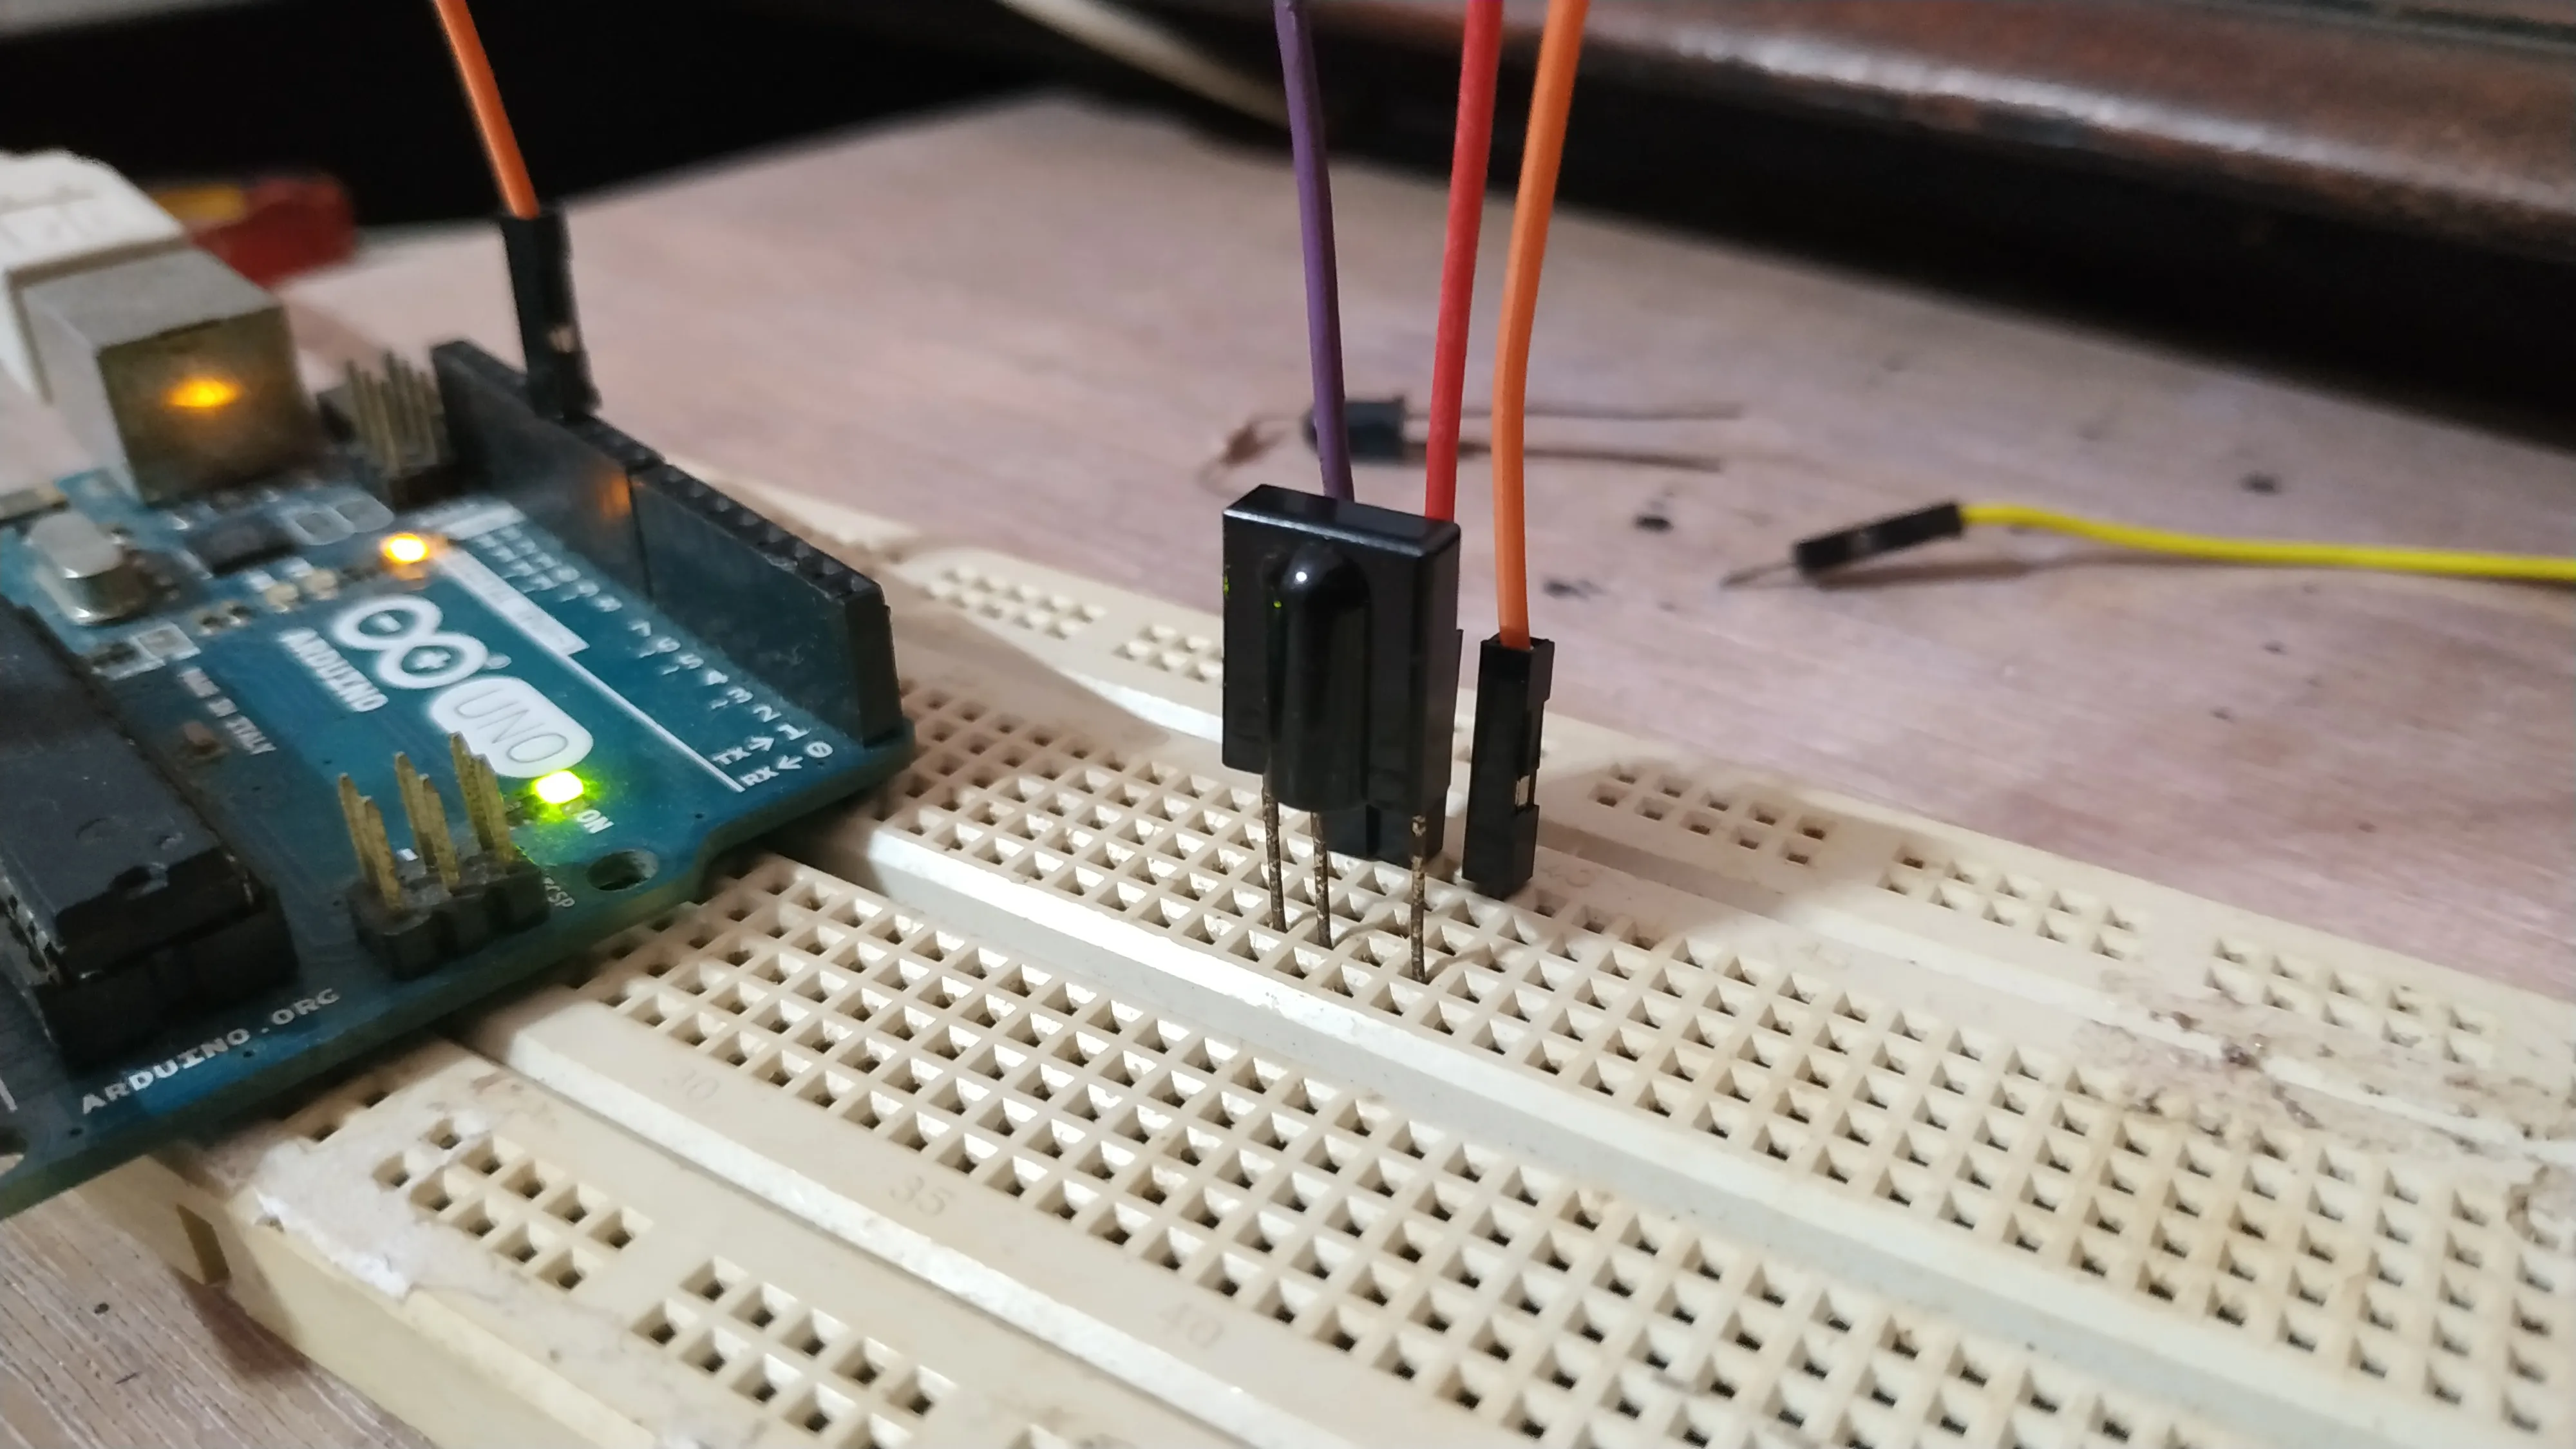
All I needed was an Arduino and an IR detector and an IR Led. I used the Arduino Uno in this case and the SM0038 IR detector. I didn’t have the popular TSOP1738 IR detector.
To make things easy I used this library.
I used this slightly modified version of the example code. This prints the hex code and the protocol used. The protocol is an enumerated list that can be seen in the IRremote.h file. This is what mine looks like:
// An enumerated list of all supported formats

typedef
enum {
UNKNOWN = -1,
UNUSED = 0,
RC5,
RC6,
NEC,
SONY,
PANASONIC,
JVC,
SAMSUNG,
WHYNTER,
AIWA_RC_T501,
LG,
SANYO,
MITSUBISHI,
DISH,
SHARP,
DENON,
PRONTO,
}
decode_type_t;
The modified IRrecvDemo Example code:
The RECV_PIN is where you should connect the output pin of the IR decoder.
/*
 * IRremote: IRrecvDemo - demonstrates receiving IR codes with IRrecv
 * An IR detector/demodulator must be connected to the input RECV_PIN.
 * Version 0.1 July, 2009
 * Copyright 2009 Ken Shirriff
 * http://arcfn.com
 */

#include <IRremote.h>

int RECV_PIN = 11;

IRrecv irrecv(RECV_PIN);

decode_results results;

void setup()
{
  Serial.begin(9600);
  irrecv.enableIRIn(); // Start the receiver
}

void loop() {
  if (irrecv.decode(&results)) {
    Serial.println(results.value, HEX);
    Serial.print("Protocol: ");
    Serial.println(results.decode_type, DEC);
    irrecv.resume(); // Receive the next value
  }
  delay(100);
}
Then upload the code and open up your serial monitor:

I pressed each button and noted down each hex value. Note: I’ve updated the code above to also print the protocol type. In my case, it printed 3 which points to NEC protocol according to the list above.
In some cases, I was getting a lot of stray values. :(
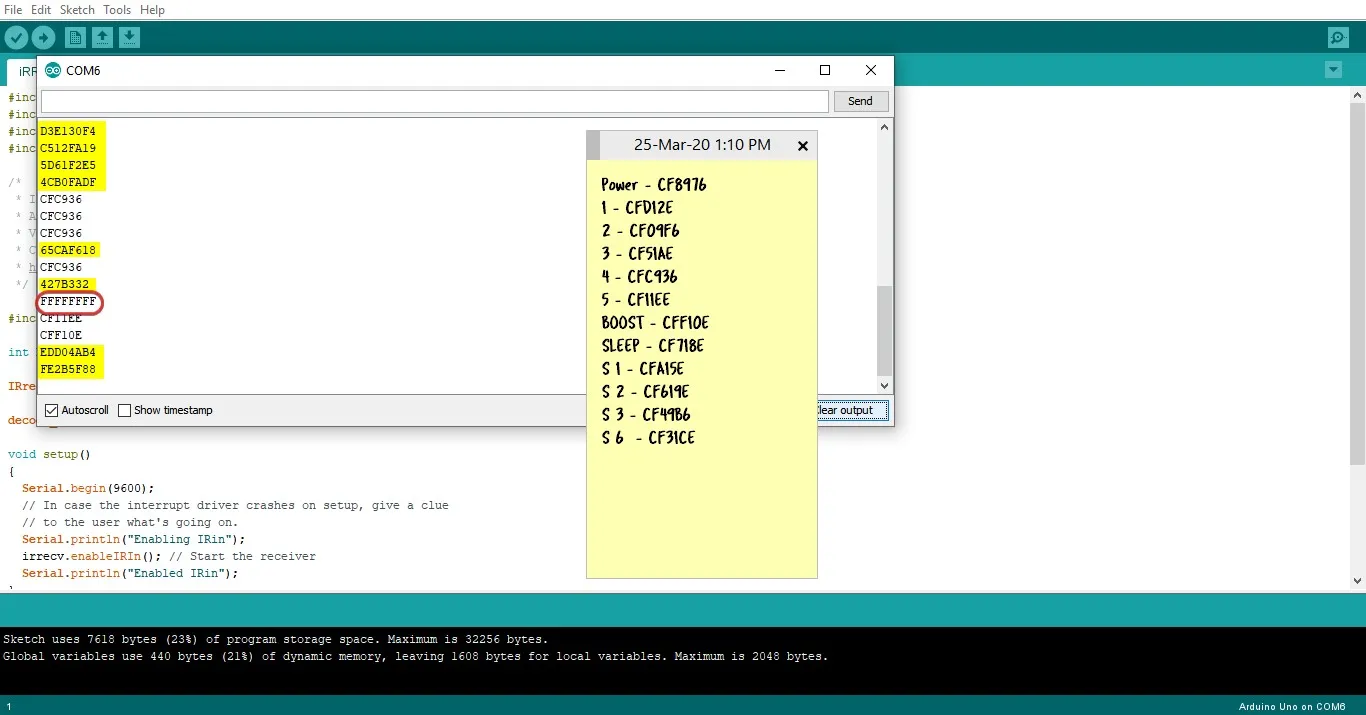
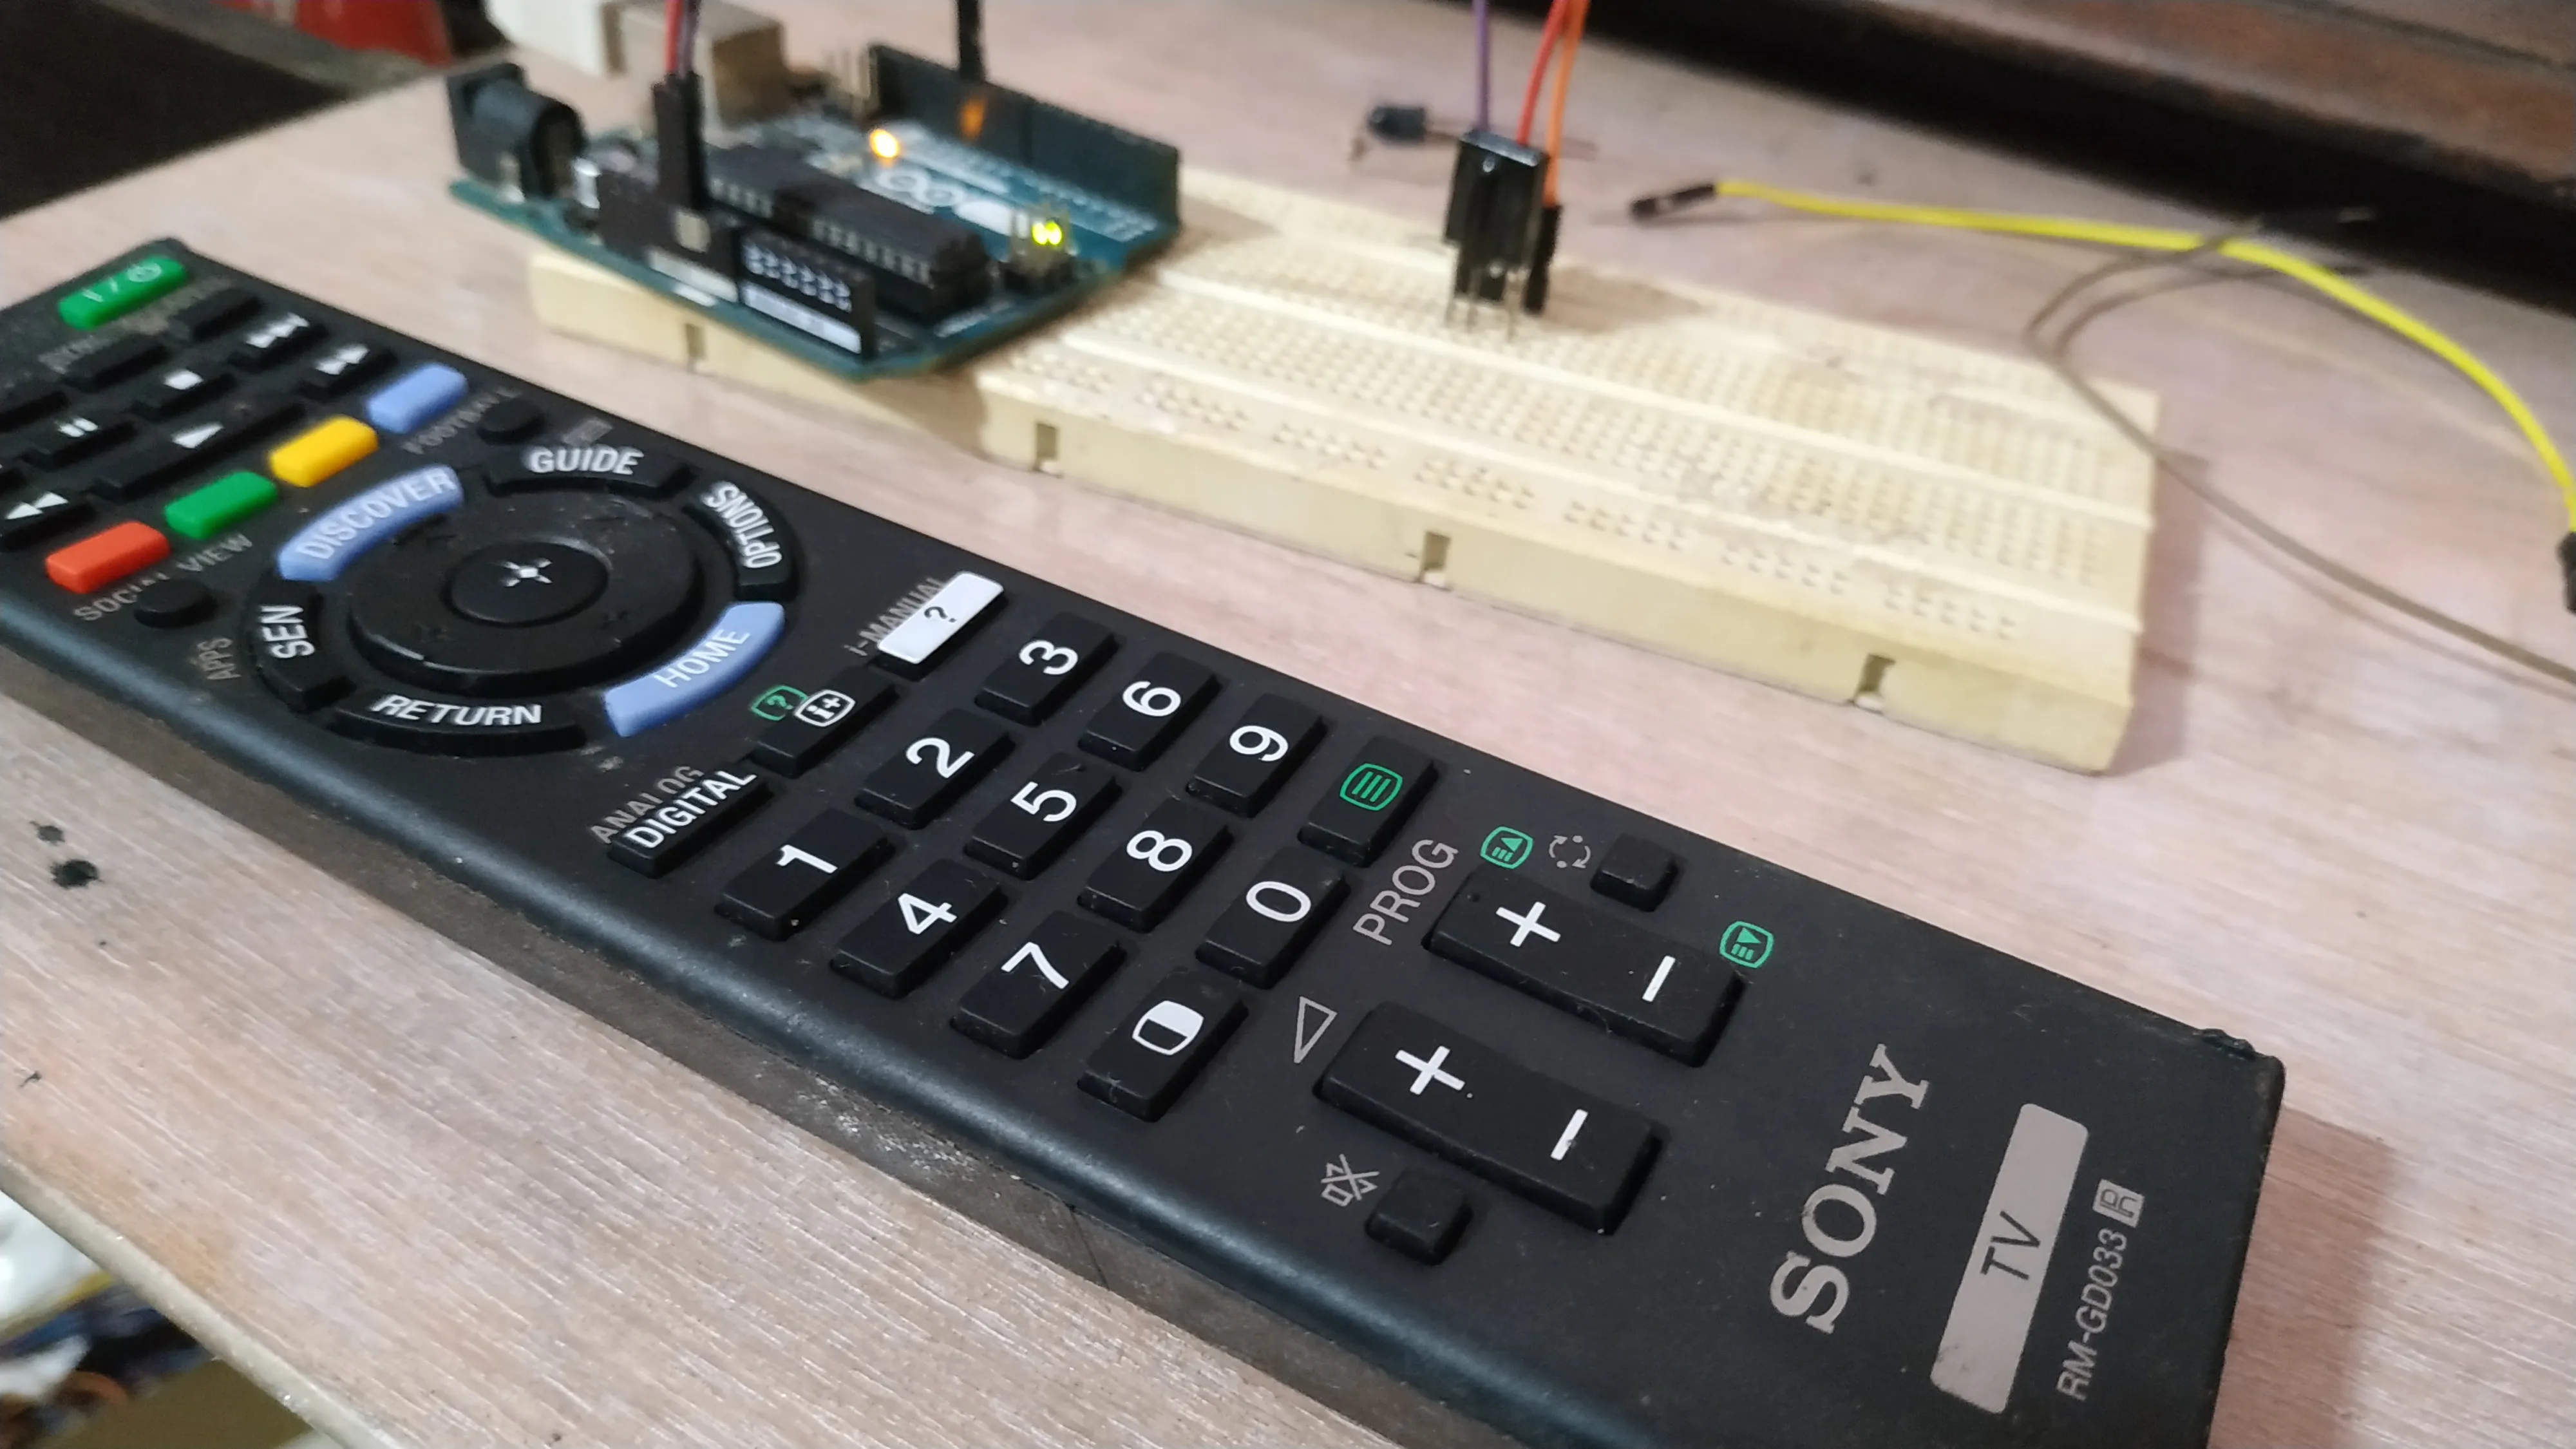
To verify the issue was not due to the lights I had in my room I turned it off and tried. It didn’t improve. So to ensure that the circuit was fine I fired up my TVs remote and it was perfect 12bit SONY IR codes.

So the Atomberg remote needs a bit more refining.
Finally, I flashed the following code to test if the fan works based on the codes I’ve written down. And here’s how to send the IR codes:
/*
* IRremote: IRsendDemo - demonstrates sending IR codes with IRsend
* An IR LED must be connected to Arduino PWM pin 3.
* Version 0.1 July, 2009
* Copyright 2009 Ken Shirriff
* http://arcfn.com
*/

#include <IRremote.h>

IRsend irsend;

void setup()
{
}

void loop()
{
irsend.sendNEC(0xCF8976, 32); // IRCode to turn fan on/off
delay(2000); //5 second delay between each signal burst
}
Even with a 47-ohm resistor (I pushed the limits of the Arduino a bit here😅 ) the LED was barely visible from the sides. It was fine when viewed from the top though.
Note: It is advisable to use a simple transistor as a switch for the IR LED instead of directly drawing current through the digital pins of the Arduino. Finally here’s the list of codes for the Gorilla Efficio Energy Saving 5 Star Rated Ceiling Fan With Remote Control And BLDC Motor : Power - CF8976
Speed 1 - CFD12E Speed 2 - CF09F6 Speed 3 - CF51AE Speed 4 - CFC936 Speed 5 - CF11EE
BOOST - CFF10E
SLEEP - CF718E Sleep 1hr - CFA15E Sleep 2hr - CF619E Sleep 3hr - CF49B6 Sleep 6hr - CF31CE
:
Comments