Getting started with the CY8CKIT-043 PSoC 4® M-Series Prototyping Kit
I know it sounds like a ” Getting started with Windows XP ” guide in 2018. 😅 You gotta do with the little you have (or more like..you gotta start with the primitive ones first).
So you may ask…Why this sudden urge to start using this?
To be frank,
- I’m tired of being told, ” You don’t do projects on boards like the Arduino (or anything that tags along with it) ”.
- I feel that using an Arduino is forcing me to take the easier route all the time without paying any heed to design optimizations. Plus, there are libraries for everything you’ll ever need.
- Takes me far away from what’s happening in the underlying hardware…eg:- when I call an internal pull-up through a line of code.
If the expertise rating of using an Arduino Board spans from 0 to 10, I can only confidently say that I’m somewhere around the 2-3 range (yeah the lower end :P). Hence, I’m in no way qualified to make those above statements.
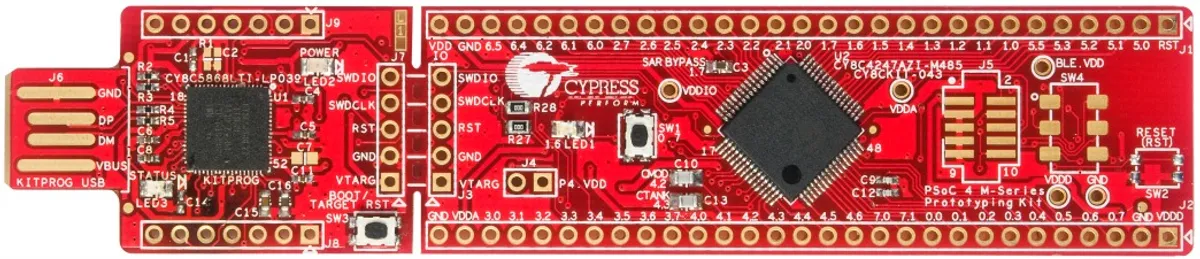
CY8CKIT-043 PSoC® 4 M-Series Prototyping Kit

Priced at $10, you’ll realize that it is totally worth every penny right when you look at the spec sheet.
Since I did make strides in learning to use the PSoC earlier, I already had the PSoC Creator installed. I used these videos as reference
Datasheet: http://www.cypress.com/file/139956/download
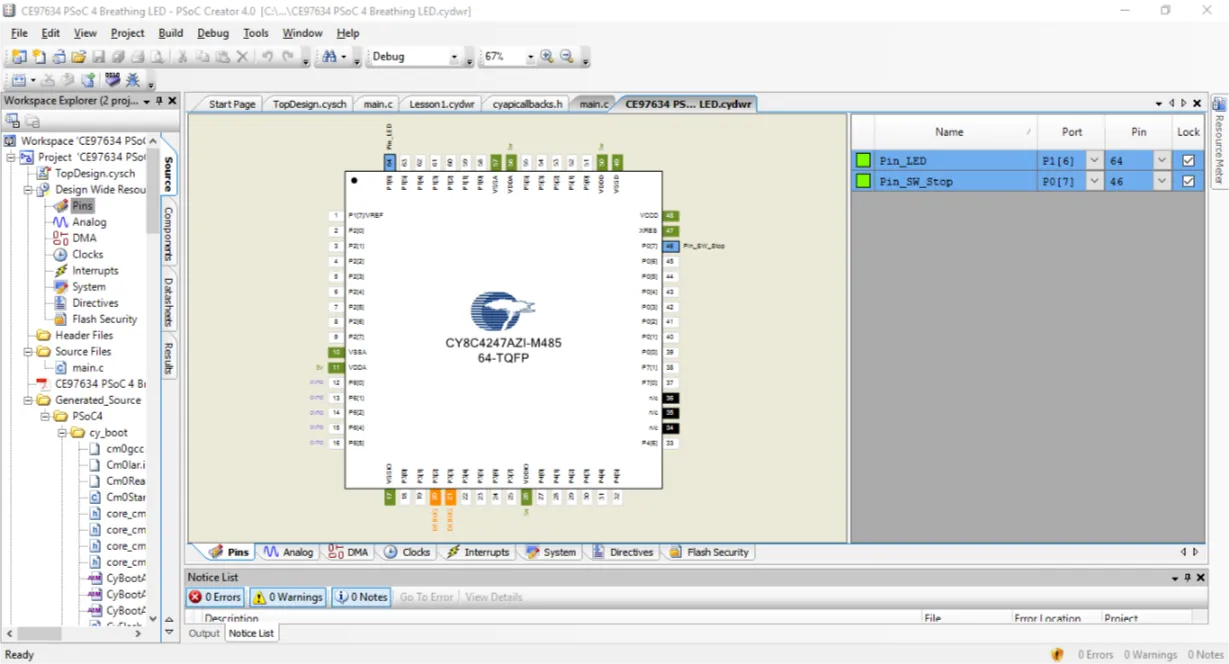
To see if the board was alright and working I uploaded the only full example onto the board. It was a breathing LED effect and everything worked fine.
⭕️ Tip: To get the breathing LED effect we need 2 PWM signals lets say of 200 and 198 and if we XOR these two signals we get the breathing effect. The time period of a single ‘breath’ ? is LCM(200,198) which is 19800
#include
int main()
{
/* Start the PWMs */
PWM_1_Start();
PWM_2_Start();

/* Start the PWM clock after starting and enabling the PWMs
The Clock is stopped in design wide resources and restarted here to make sure
both the PWM outputs are synchronized */
PWM_Clock_Start();

for(;;)
{
/* Put CPU to Sleep as CPU is not involved the operation */
CySysPmSleep();
}
}
After this, I started working on the ” Hello World” project of every microcontroller which is simply a Blink fn. After a few trials, it was all set and working fine. Then I tried controlling the LED with the built-in switch. That too went well.
To go further, I needed more than an LED to play around with. Since the device didn’t come with headers soldered in, I had to manually solder female headers onto the board.
All set to start messing around with this!
Comments